There is some prep, but I try my hardest to have the children do most of the work.
Materials
Construction paper: green, black, and white
Black & White crayon
Glue
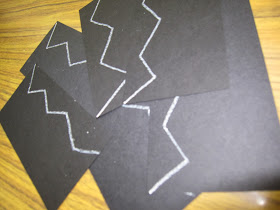
I had them cut their own hair
I cut 3 sides of the green paper 7x7 and had the kids cut the last side on their own by following a black straight line.
As for the eyes. I cut them myself ( my kids are not able to cut circles yet).
Awesome trick one of my co-workers taught me was, stack a few sheets of paper, staple them so they stay in place and cut away. You can do this with anything you are trying cut multiples in :)
The rest of the activity was a step by step craft. I had them glue the green square to their white matted paper.
Then glue their hair on to their green square, that they had cut out earlier that morning.
Then pick the shape of eye they liked, round, oval, crescent and then glue it under the hair. Many of them drew pupils on their eyeballs.
After everything was glued on, we talked about the different ways we could make our Frankenstein.
Mouth: happy, mad, sad, silly...
Eyebrows: one, pointy, wiggly, at a slant, two separate
Then I had them use their imagination and make their own.
Those "E's" are stitches Those round objects are teeth
Have you done a Frankenstein craft with your preschoolers? There are so many more creative ways to make a Frankenstein. When deciding which one to do, take into account the level of your kids :) That it can be a little challenging, but not impossible; this will make it so much more fun for them :)
HAPPY HALLOWEEN


Wow what a great blog, i really enjoyed reading this, good luck in your work. Turramurra preschool
ReplyDelete